How-to: Setup Your Personal VPN With Amazon EC2 for FREE
This tutorial will walk you through setting up a personal PPTP VPN server and connecting to it from a Windows Client. Using a VPN have merits like browsing the internet in relative privacy. Also new signups can use Amazon EC2 micro instance without paying for the first year.
Step 1: Get Set Up
Follow the official get set up guide for Amazon EC2 here. The intructions are more comprehensive, in my opinoin, than blog posts from Google search results.
Step 2: Create EC2 Instance
Follow step 1: Launch an Instance and step 2: Connect to your Instance of the offical get started guide for Amazon EC2 here.
Note1: Instead of Select an Amazon Machine Image(AMI), choose a ubuntu 12.04 server image.
Note2: The dafault accout for AMI images is ec2-user, however, for ubuntu images you have to use ubuntu to connect to your instance.
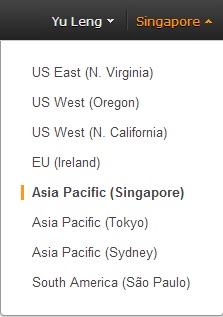
Note3: In the AWS Management Console, choose a regoin that is geograpgically closest to your location to have best browsing experience. I have chosen Singapore as shown below.
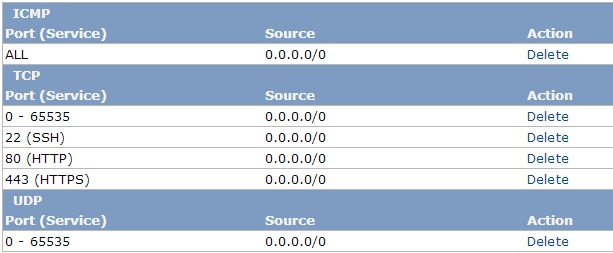
Note4: Below is the my security group settings for your reference.
Step 3: Configure EC2 Instance
Follow the guide on the offical Ubuntu documentation here to configure your ec2 instance into a PPTP server. Remember to right-click on your running instance in AWS Management Console and reboot your ec2 instance after you are done.
Step 4.1: Connecting from a Windows 7 Client
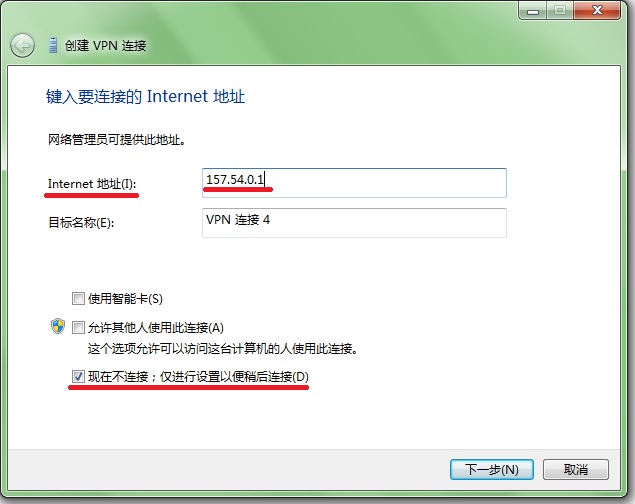
Open your Google Chrome, type in chrome://settings/search#proxy, hit enter and then click on Change proxy settings button. Click new VPN(p). Enter either your ec2 instance public name or ip address as internet address and check the 3rd checkbox like shown below.
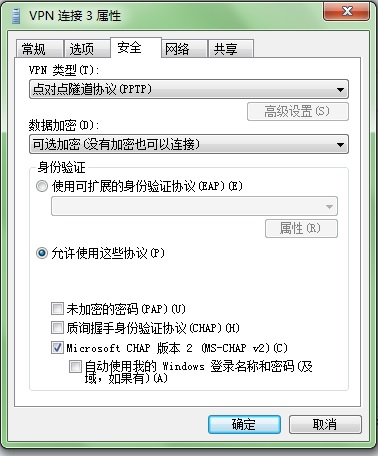
Click next, enter your VPN account name and password you have just setup in setp 3, click next and finally click finish. Now you should be able to see your VPN connection once you click the network icon in the notification area on your windows task bar. Right click on your VPN connection, go to properties, under security tab, configure everything the same as the screenshot below.
Now go ahead connect to your VPN, type in your account and password. Wait till the status turns into Connected.
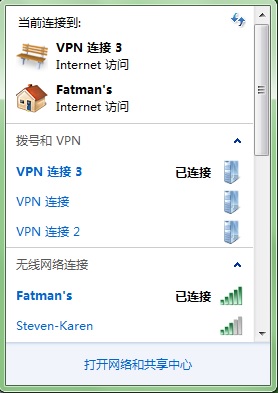
Congratulations! You now have your own personal VPN.